Unfortunately for us, winter was a surprisingly humid season so all of our kindling and yes, even the matches had a hint of dampness that made our fire starting especially difficult. Balls of paper would merely smolder and blacken the tiny bits of sawdust and kindling above it and often, I found myself fiddling with the fire for up to twenty minutes using scads and scads of matches.
Occasionally, we had some leftover wax from tea lights which was helpful in producing a flame that lasted more than 10 seconds before being snuffed out. The thing was, if something could just burn for more than a few seconds at a time, our fire making would have gone a lot smoother.
How I wish that Winter 2011 Shannon knew Winter 2010 Shannon. Some things have changed for us, and A.) this winter so far isn't nearly as biting cold as the last, and B.) we (sadly) no longer have a wood stove but that doesn't stop me from making these cool things anyway!

These fire starters would have saved me hours spent kneeling on the floor with a face full of smoke last winter. They're so easy to make, albeit a bit time-consuming waiting for the wax to melt... but the time spent in the kitchen making these will save you lots of time in front of your wood stove. Also, they're great to give to a friend who has a wood stove! Hooray for easy hand made Christmas gifts!
To begin, I must caution you that hot wax is no fun to get all over yourself and your kitchen, not to mention on your clothes and carpets, so I must emphasize caution when working on this project. Take your time.
To begin, I must caution you that hot wax is no fun to get all over yourself and your kitchen, not to mention on your clothes and carpets, so I must emphasize caution when working on this project. Take your time.
What you need to get started:

- A 1kg (about 2lb) bag of paraffin wax beads for candle making. If you're interested in a more green option, go for soy wax, but it can be a bit more expensive.
- Candle wick. You'll need at least 4 feet to make 24 muffin-tin sized fire starters. Save yourself some money and get unwaxed wick. It's super easy to wax it yourself.
- Small pine cones. I made 24 fire starters, so I needed 24 pine cones!
- A glass measuring cup. Pyrex and Anchor are my preferred cups because they are made to handle heat. It's best if they have an open handle for hooking on the side of your pot.
- A pot of hot water. I had mine boiling because the wax was low in the measuring cup, but you can boil the water then put it on a low simmer to keep it hot for this project. Make sure you use a tall enough pot that the measuring cup wont touch the bottom of it when it's in the water, hooked over the side.
- A muffin tin.
- A potholder.
Place a few handfuls of wax beads into your glass measuring cup, then hook the handle over the side of the pot, submerging the cup slightly into the hot water. Make sure that your hot water at least comes up level with the wax. You can see through the glass that my water is pretty level with the wax.

After the wax has melted about 2/3rds of the way done, take your wick and lower it slowly into the hot wax. You'll have to wind it around itself inside the measuring cup, and that's fine. Just make sure that all of it (except the little bit you're holding) gets dipped in. Lift the wick out of the wax gently and let it finish dripping into the measuring cup, then grasp it on opposite ends and pull it so the wick is straight. You may use dish gloves if the wax is too hot for you. I didn't need to.
You can see the difference between the waxed and unwaxed wick in the photo (below left). The wick that is stiff straight is waxed. The limp wick is not.

Waxing your wick is important because it keeps it stiff while inserting it into the hot wax after you pour it into the muffin molds and it's actually needed to get the candle burning. We'll get there in a minute. Just know you won't want to be working with a limp wick...
(I am refraining from any and all wick jokes at the moment, I just want you to know that. haha)
Once your wick has cooled and hardened, you can measure it out and cut the wick into little wicks for each muffin mold. Make sure that you have enough wick to go from the center of each mold to reach out a half an inch from the rim. My wicks were about an two inches long. Set them aside.
By now, your wax might be completely melted. Grab your pot holder (again, I didn't use one but decide for yourself. It's safer to use an oven mit, as the glass can be very hot) and pick your measuring cup up out of the water. Let it hover over the pot for a moment or two to get excess water off - then pour the hot wax directly into the muffin molds.

Here you can see that I only filled them about half way. After making a few of them, I recommend filling the muffin molds at least 3/4 the way full.
Let the wax sit for about 10 seconds, then stick your wicks into the wax.

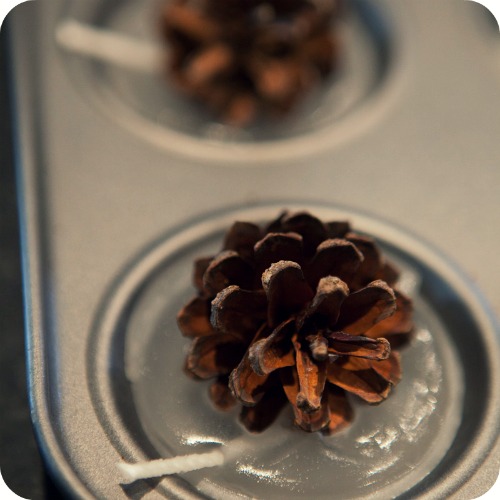
Let them sit overnight to harden and in the morning you should be able to just pop them right out! If you're impatient like me, stick them in the fridge for about an hour. I also only have one muffin tin that makes 12 muffins... so there's also that. The fridge worked great and actually shrunk the wax a little so they came out just fine.
Done and done! Now you have some pretty and easy to use fire starters for yourself or to give to a friend!

Clean up is a breeze if you take a paper towel or even just a regular towel and wipe the measuring cup while it's still really warm and the wax is still really melty. Just wipe it and the pot out (in case you are like me and spilled a little down the side of the measuring cup... oops), and they should be good as new!
Why it Works:
So in my infinite wisdom, up until a few years ago, I always thought that candle wicks burned because the cotton was on fire, and the wax just slowed things down and evaporated... not so much. Candle wicks are usually made out of really absorbent material (often it's cotton) so the wick absorbs the hot liquid wax while it's burning, vaporizes the wax, and it's really the vapor that burns. The wick doesn't burn out because the wax cools it enough, the same way you can boil water in a paper cup in a fire. The cup won't burst into flames where the water is, because the water cools the cup enough to keep it from burning. Cool huh?
The fire starter will basically act like a candle, until it reaches the pine cone, which will hopefully light on fire and cause the paraffin wax to melt and more vapor to alight as well.
How To Use:
Now, you don't want to light the fire starters only to have the wax dribble down your fire grate and into the ashes... so you have to build your fire a little differently. Place a flat-ish piece of wood on the bottom of your fire place, then place your fire starter on top of it. Place kindling under, around, and in a little "tee-pee" surrounding your fire starter, making sure that it still has enough space for air to breathe. Light your wick and watch the magic happen! If you've used paraffin wax for this project as I have, do remember this: because paraffin is made from crude oil (you're welcome, Mother Nature), it will burn hot and intense and is difficult to put out. That being said, it's great for fire starters and as always be very careful.
I hope you've enjoyed this little tutorial. If you have any questions or if anything seems unclear, please let me know. You can leave a comment here or email me at theblogger {at} spiritedshannon.com
Don't forget to visit other tutorials in the "tutorials" tab at the top of the page!
This post is linked up at these lovely blogs: