My, my this space has been quiet. Since October. About three months! I'm sorry for that. Much has happened! I promise to catch you up over the course of the next month or so.
First of all, HAPPY NEW YEAR! Hooray for 2014! So far, 2014 has brought good things and change. The biggest change has been to my diet. Which is that I can no longer eat gluteny, wheaty foods. It just doesn't process well in my belly and gives me lots of gassy pain a little while after I eat it. Too much information? Perhaps you'll forgive me with this lovely apology recipe I have for you. Dare I say a Pancake Apology?

But first, a little background.
I have toyed with gluten-free eating a few times in the past. In April of 2010, I wrote here about some symptoms I had had and to be honest, looking back, I've had similar symptoms on and off ever since - I just always brush them off.
On a visit to the states over Thanksgiving, I was caring for my cute dad and twice in a week, I had to stop while I was getting him ready for bed and bend over clutching my stomach in pain. Twice, the pain literally brought me to my knees, gasping. It was terrible. My dad suggested/reminded me that I might have some sort of gluten intolerance, and it was then that I decided to cut gluten out of my diet. Done. I will get diagnosed by a specialist at some point, to figure out what it is that is actually wrong, but for now I don't feel like I need to have an official name for what ails me.
I cut gluten out for two weeks, and only had pain in my gut on the two days I made "mistakes" by forgetting and eating pasta or caving into my niece's delicious chocolate chip cookies. I think I know what's up, and I know how to keep the pain away. That's enough for me.
Over the past few weeks, I have searched high and low for alternative flours and starches, as well as done quite a bit of research as to what types of flours and starches can be substituted for what. Pinterest has been a great resource, as well as TheLocal.se, and lots of other websites! I love the internet.
My first few attempts at gluten-free cooking (with alternative flours) were disappointing to say the least. Attempt A; Muffins. The flavor was off but the color was good. Attempt B; Muffins. The color was terrible, but it tasted ok. Attempt C; (I don't remember what I was attempting...) The taste was terrible, it crumbled to bits, and it looked like dog food. Not to mention the smell. Oh man.
Needless to say, I went into my pancake making experience armed with an arsenal of past mistakes, mistakes of others (through blog-reading), and a little more knowledge as to what I'm doing this time.
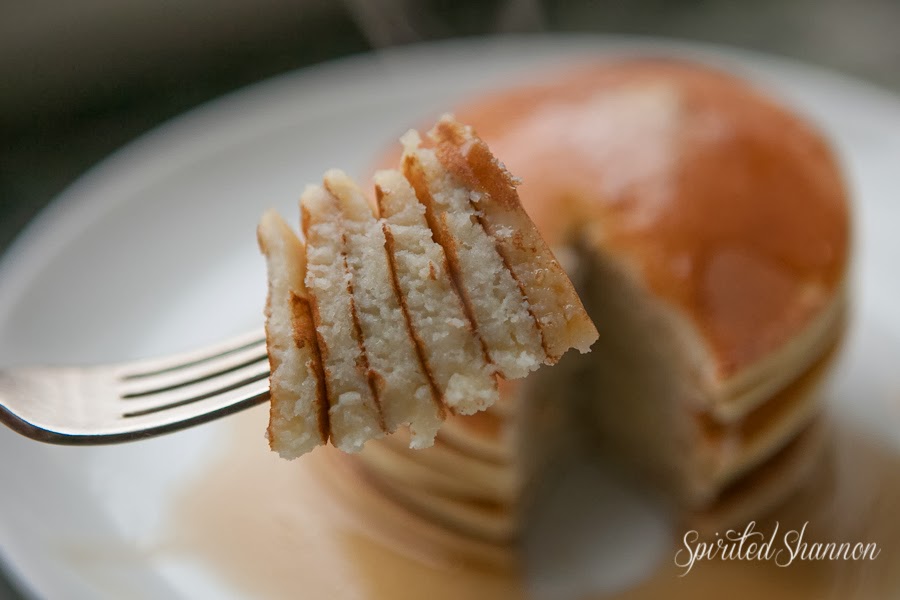
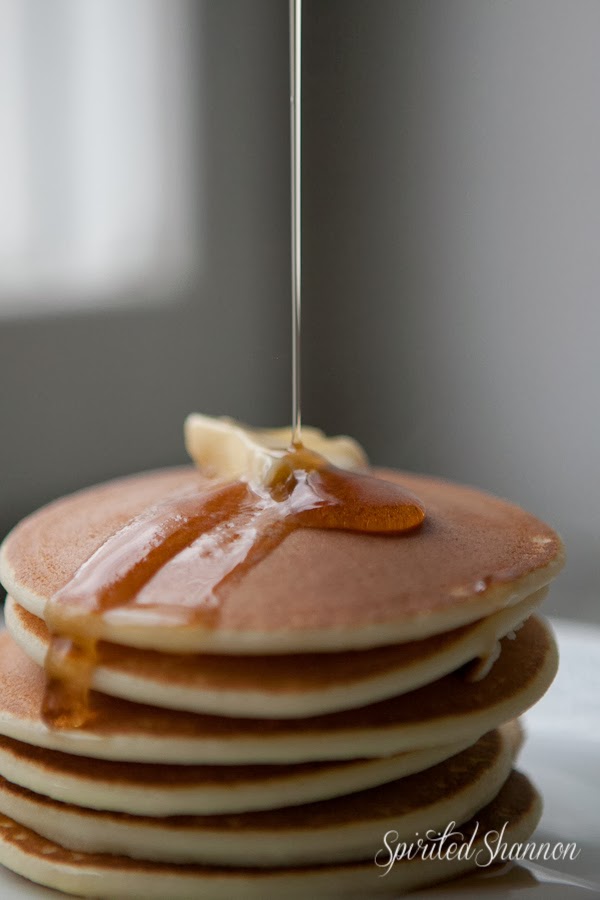
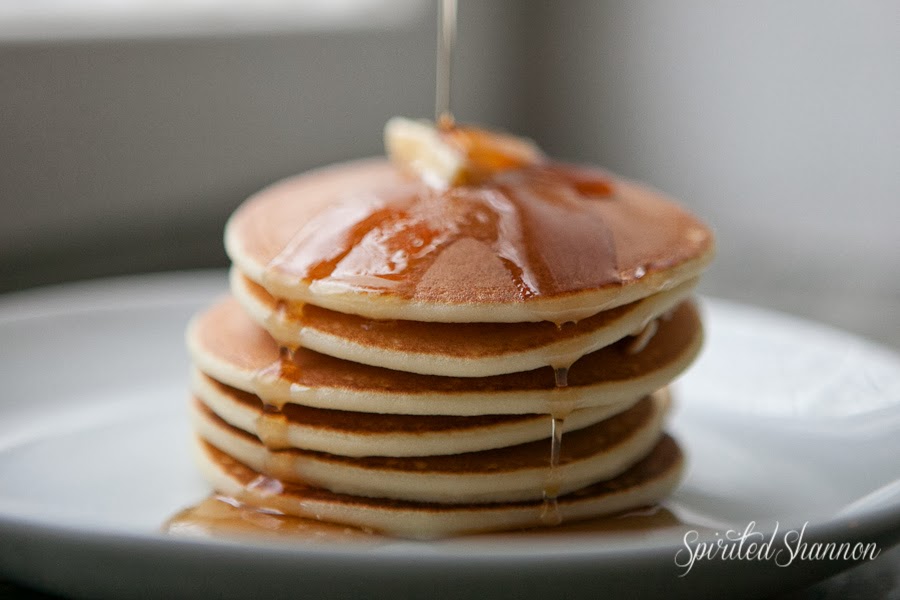
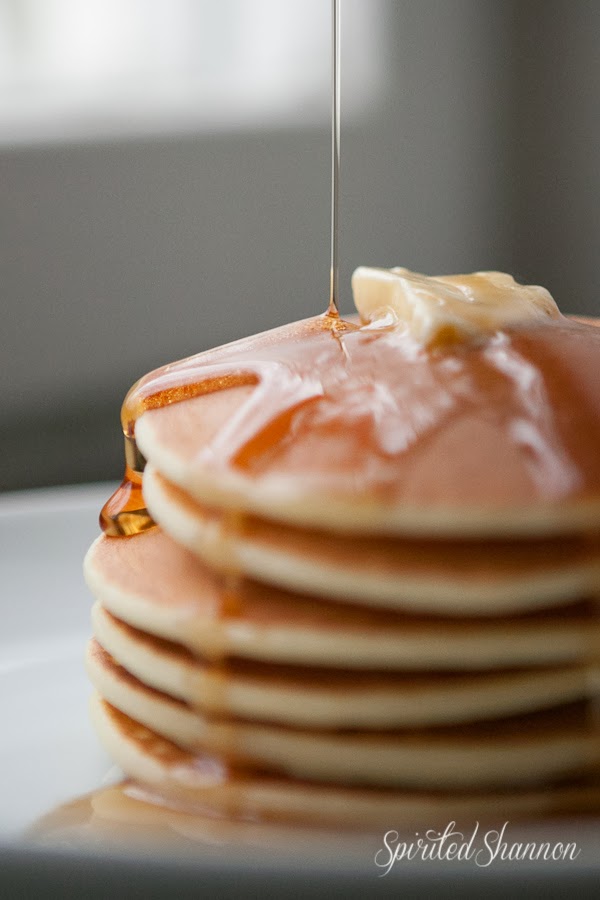
Ladies and gentlemen, it was a gigantic success. Gluten-free pancakes that were everything that a pancake should be. Soft, moist, springy, chewy delicious victory. If someone had served these to me without telling me they were gluten-free, I wouldn't have guessed.
The batter is a great consistency!

The pancakes have bubbles while frying in the pan, which is always encouraging.


I had to tell someone. I was home alone. Bilbo doesn't care about silly things like pancakes (unless he is possibly stealing a morsel from me)... I immediately texted Jessica... videos and squeeeeee ensued. Much rejoicing was had.


Recipe time!
Gluten Free Pancakes adapted from Allrecipes.com
Serves 1-2
Ingredients:
- 1C rice flour
- 2 Tbs tapioca flour (aka: Lafun flour or Cassava flour)
- 2 Tbs arrowroot powder
- 2 tsp sugar
- 1/2 tsp salt
- 1/2 tsp xanthan gum (a binder)
- 1 egg
- 2 tsp vanilla
- 1.5 cups milk of choice (I have made it successfully with almond, coconut, and cow's milks - almond being my favourite)
Directions:
Mix dry ingredients together until well blended. Add milk, vanilla, and egg to dry mix and whisk together until smooth. Meanwhile, have your nonstick pan heating on the stove. When your pan has gotten hot enough, pour a bit of batter onto the pan and set aside. Wait for little bubbles to appear around the edges of the pancakes, then swiftly flip them over in one motion with your spatula.
I always have one or two "fail" pancakes at the start of each batch. I just use those as a guide to adjust my temperature and the cooking time. Before long, you will figure out the time and perfect temperature and your pancakes will come out perfect!
Enjoy!