... at least, this is how I did it.
*ETA- i get a lot of hits on this post for people looking for how to take-in/alter a wool coat. Welcome! I would love to know if this post was useful to you, so please let me know in a comment if it was!
Any tips or suggestions are also welcome :)

The blogger went on to say that she had found that coat at a second hand shop and had altered it herself. Well... I can do that too! She hadn't posted a tutorial or said how she did it, but according to her comments on it, she had done it "quick and dirty". Well... if that's the result of "quick and dirty", i'm super impressed! Someone once told me that anything worth doing, is worth doing well, though (not meaning to imply that she didn't do hers well, because she totally did!) - and i decided to take my time. This project took me about 4.5 hours from start to finish.
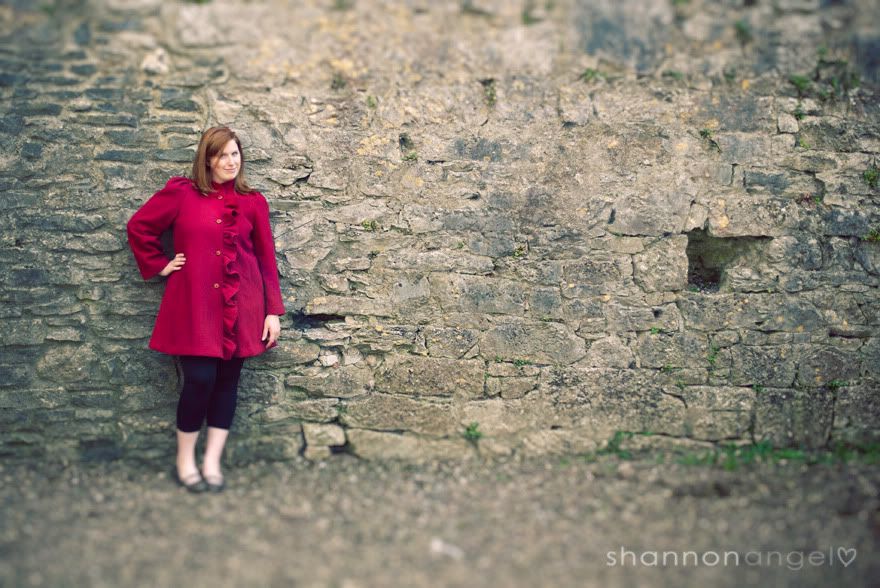
A beautiful woolen coat. Bright red. Mid-calf length. Too big, but not TOO too big, if you know what i mean.
Slightly puffed sleeves... amazing. I bought it for €5.
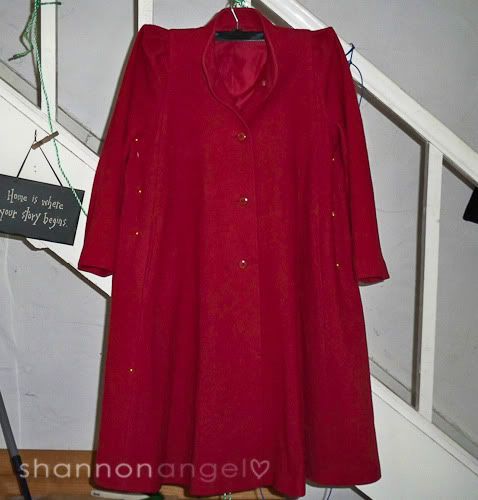
I almost forgot to take a "before" photo. This was taken after i had already pinned it where it needed to be taken in. Unfortunately, i don't have a dummy to try clothes on and see how they fit, so i measured myself and stuffed my husband's clothes to match my dimensions! I just had to add a little somethin' up top, and mentally remember i'm about 1" wider than he is around the waist. I should mention that he was still wearing his clothes at the time...
Hahaha sorry though, no photos were taken of this process! I felt bad enough that i couldn't stop laughing at the situation while i was pinning. He's such a good sport.
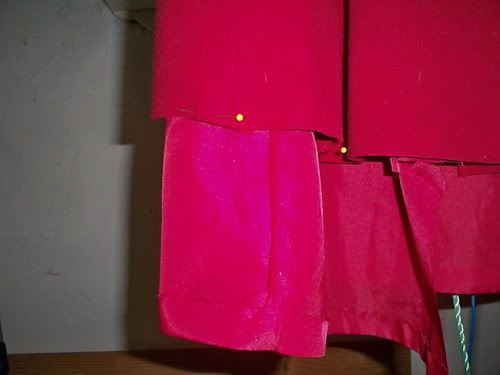
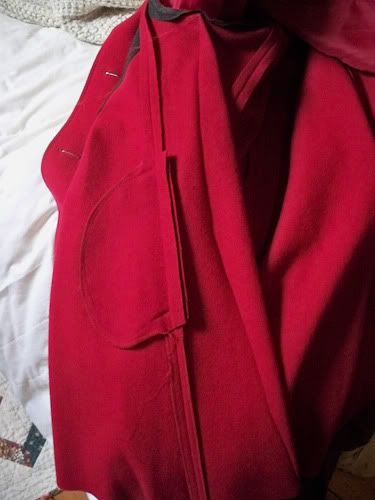
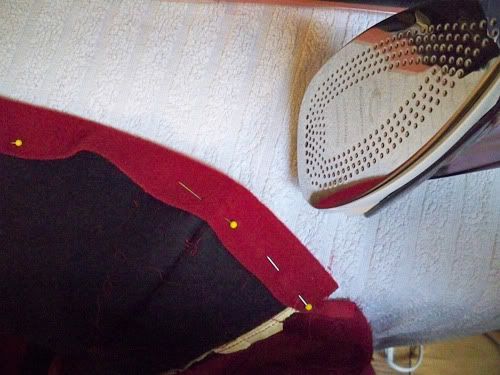
Here, you can see the pins in the sides and a pin toward the bottom of the coat. The pin there told me how much would be "too short" for when i hemmed it. I decided to take 8" off the length. I measured 8" up from the bottom all the way around the coat, pinned as a guide, and cut.
Next, I measured from the edge of the coat to the inside of the pins (on the sides where i intended to take in the coat). Then i turned the self-made seam to the inside.
BUT before i could do that, i had to detach the lining.
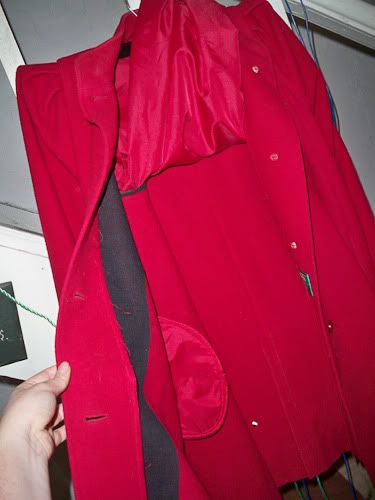
Here, the coat is open and the lining is thrown up over the shoulder of the coat. This is when i found the center of the side seam below the sleeves, and re-pinned the part that i wanted to take in, a little more precisely. I hadn't gotten the original seams (on the outside) quite in the center, which i worried would have made the pockets end up asymmetrical.
Above, you can see where i sewed the seam. I sewed a slight curve to make it more fitted and sewed from the arm-pit to the edge of the hem at the bottom. I did the same on the other side. Once the wool was tailored, i tried it on to make sure it was a good fit.
Next, i wanted to tailor the lining to make sure it fit the coat.
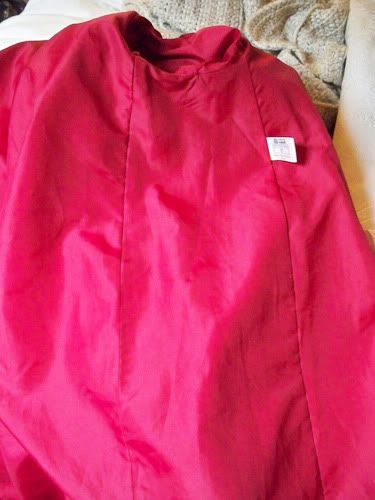
Above, you can see the panel (in the middle) that i wanted to alter. The arm of the coat is above and just outside of the photo is the bottom of the coat. This, i did a little quick and dirty, because i'm not too concerned with how pretty the lining is, but at the same time, i don't want it to be horribly ugly, either. I turned the lining inside out and put folded it in half:
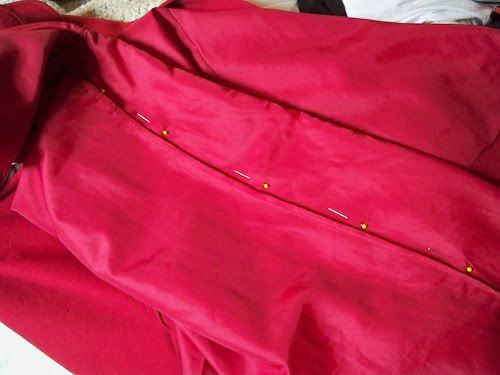
... then pinned it near the original seams (on either side of the panel) so that the lining wouldn't creep as i sewed. Then...
... i just sewed, freehand. I knew about how deep i had sewn my seam on the wool, so i just estimated. I sewed a similar line as i had done for the shell. I did this for the other side as well.
I turned the lining back to face the correct way, and re-attached it where it was originally sewn. I figured this was pretty straightforward, so i didn't include a photo.
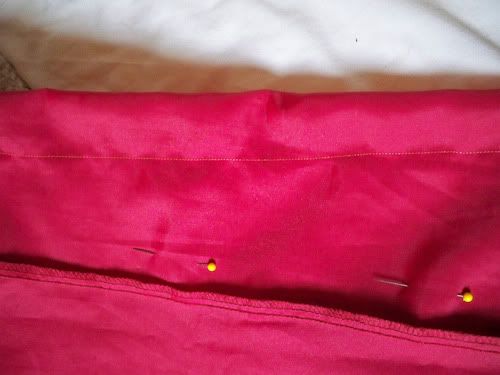
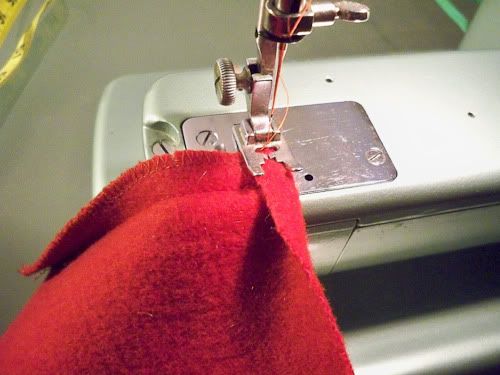
After i finished re-attaching the lining, i started to hem the wool outerlayer. I folded it up about an inch and a half all the way around (i just eyeballed it), and ironed it on the wool setting of my iron:
You can kinda see that the lining is the same length as the coat at this point in the photo (after the hemming). I went ahead and cut off about half an inch of the lining, folded it up, then sewed it on the machine.
Next, i hand-tacked the wool seam up to be an "invisible" seam.
When that was finished, the tailoring of my coat was nearly complete! All that remains is adding the ruffle.
I cut out a 5" wide strip from the leftover wool from shortening it. I cut a curve at the top of the ruffle to match the curve of the top collar of the coat. I free-sewed a half-inch seam down one side of the ruffle and around the curve, bottom to top.
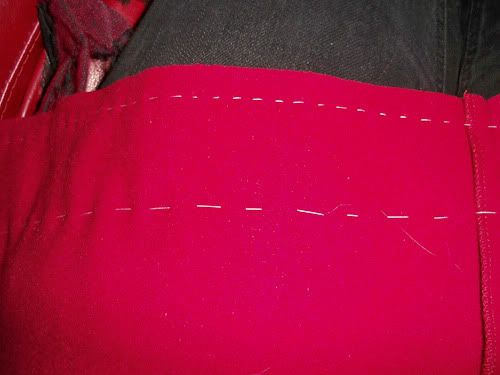
Then i sewed some basting stitches all the way along the ruffle. I sewed a thicker stitch and a thinner stitch as an experiment to see if it would change the effect of the ruffle. I think it did, in the end.
Then i pulled the threads to create the "ruffle" effect:
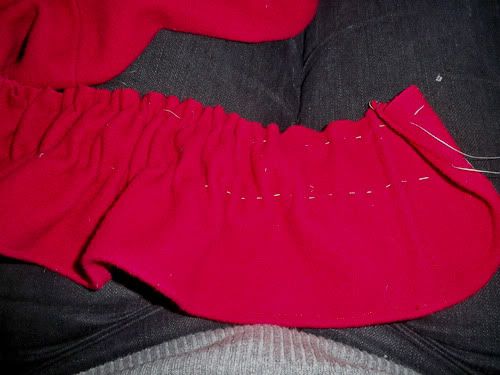
I pinned the top of the ruffle to the coat, then adjusted the ruffle's... erm... ruffles to be even along the length of the coat, top to bottom, and pinned the ruffle on.
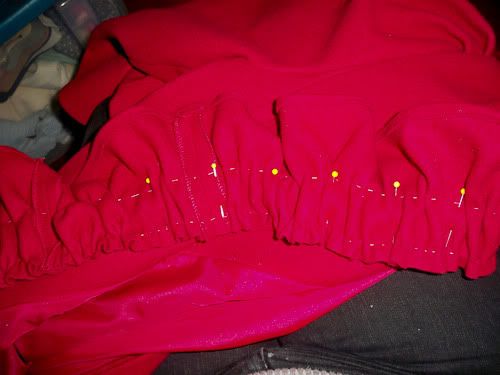
When it was all pinned and the ruffles were even, i sewed along the original sewing line on the front of the coat, attaching the ruffle to the side of the coat that the button holes are.
That's it! Finished!